
Spa Night at Home by Yourself Essentials
#relax #restore #rejuvenate
Spa Night At Home by Yourself Essentials

photo by Christian Mackie
Full Body Spa Night from the Inside Out
One of my favorite things is a spa night at home. Below, I will go over a 3-step day spa routine and the long-term benefits backed by research of each step in this at home spa experience. The spa essentials recommended for each step are linked at the very bottom of this blog post. This 3-step spa routine is a simple way to bring the spa home.

photo by Marks of Mana
Here’s How We Will Bring the Spa Home
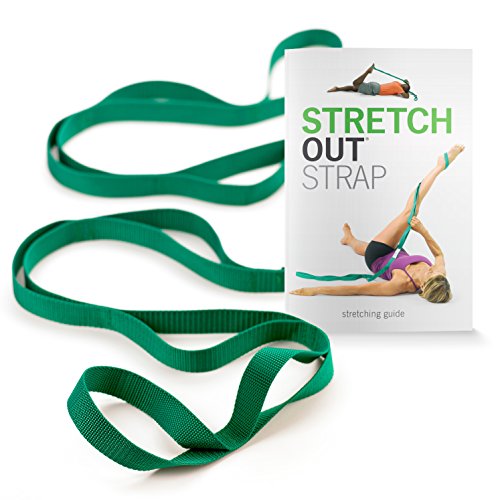
Step 1: Stretch.
Bullet points taken from International Journal of Sports Physical Therapy’s article and this pubMed study. Physical benefits of stretching include:

photo by Laura Stone. Using a stretch strap.
Increases muscle length.
Aligns collagen fibers during muscle healing.
Increases connectivity in muscles that are aged.
Will allow blood to flow to the areas that are stretched. *This will prepare you for the next step, step 2 in your spa night at home (BELOW).
Recommended Spa Essential: A stretch strap. *Spa essential linked at the bottom of this blog post.
A stretch strap will give you an even deeper stretch. Stretch straps are super easy to travel with after a long day of sitting in a car or plane. Here, I also mention a stretch strap in my blog post Packing Light for a Girls Trip! Which Products I Picked!
Step 2: Infrared Sauna Blanket Treatment.
Bullet points taken from this study from the National Institute of Health , this study by Mackay Medical College and this study by Dr. Cheng-Lung Lee, the health benefits of an infrared sauna blanket include:

photo by Laura Stone
Far infrared sauna heat penetrates deeper into fat and the neuromuscular system than traditional warm sauna air.
Decreases cortisol levels (stress levels) in the body.
Growth hormone (HGH) increases during and after a sauna session (this is an anti aging hormone).
Reduces inflammation in the body.
Far infrared sauna’s are effective in “scavenging superoxide anions in blood.” This means it has an anti-oxidative effect in the human body, even through the blood.
Step 3: LED light therapy facial mask. Listen to your favorite music while enjoying the many benefits of benefits of LED phototherapy.
Bullet points taken from The Journal of Clinical and Aesthetic Dermatology and this study at the Department of Dermatology at the National Medical Center , LED phototherapy has many benefits and has an “excellent safety protocol.” Some of the benefits of LED light therapy include:

photo of Dermashine PRO 7 Color LED Face Mask
Acne clearing.
Wound healing.
Psoriasis.
Skin rejuvenation.
Collagen synthesis.
Growth factors.
Extracellular matrix production by activating cellular mitochondrial respiratory pathways.
Lifting and tightening of the skin.
No adverse effects were reported with LED lights.
Brightened skin tone.
Improved skin texture.
Recommended Spa Essential: Dermashine PRO 7 Color LED Face Mask. *Spa essential linked at the bottom of this blog post…..This is the LED face mask I have. My review on the Dermashine PRO 7 Color LED mask is I love how there are 7 options of wavelengths to choose from, and this mask so easy to use.
Bonus Recommended Spa Essential: Alpha Lipoic Acid 5% (30ml) by The Ordinary. *Product linked at the bottom of the blog post.
Apply Alpha Lipoic Acid (ALA) on your skin before your LED phototherapy session. According to The Journal of Clinical and Aesthetic Dermatology, “Photodynamic therapy with ALA has been used to treat a range of conditions, including from pre-cancerous and cancerous lesions and photoaged skin.”
THE SPA ESSENTIALS. HERE’S WHAT YOU’LL NEED:


I hope you enjoy your spa night at home by yourself and enjoy how you can bring the spa home with these spa essentials. This 3-step spa routine is very simple, yet delivers research-backed and long-term results. Cheers to your spa night!
Xx,
Laura
Insta: @ooohlalastone


DIY Coffee Body Scrub!
3 ingredient DIY coffee scrub
~Lavender, Coffee and Coconut Oil Body Scrub~

I love this body coffee scrub and it’s so easy to make! It’s definitely an easy, lazy DIY coffee scrub. We’re going to approximate the amount of the 3 ingredients used. Play around with the consistency you like! If you’d like a more moisturizing scrub, add more coconut oil. If you prefer it like a sugar scrub, add more coffee grounds. It’s really that easy!
If you’re a coffee lover, this will put to use the leftover coffee grounds that are left in the coffee filter after you make your morning coffee!
The coffee grounds exfoliate, and the caffeine content in the coffee promotes blood flow.
The coconut oil moisturizes your skin.
The lavender essential oil adds an aromatherapy and relaxing experience to your scrub.
If you would like to stick with organic skincare, simply keep your 3 ingredients organic! :)
What you’ll need:
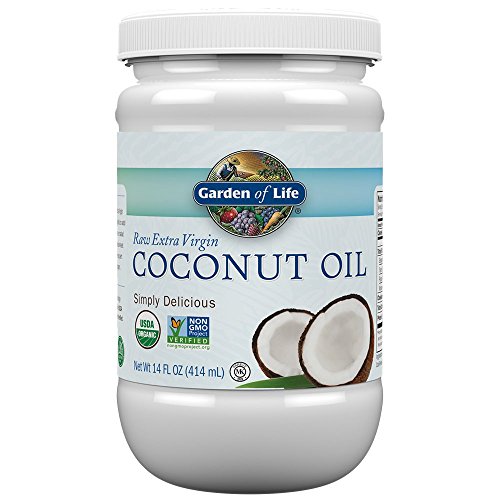
Organic coconut oil
Organic lavender essential oil
Organic coffee grounds
Coffee Maker
Jar
Directions:
Brew your morning coffee.
Add leftover coffee grounds to your jar.
Add about 1tbsp - 2tbsp of Coconut Oil to the jar with coffee grounds.
Add a few drops of lavender oil to the coconut oil and coffee grounds.
Mix all 3 ingredients together.
Each time you make coffee, keep adding the coffee grounds to the jar, and continue replenishing your coffee scrub jar.
I especially love the smell of coffee, lavender and coconut oil while I’m exfoliating with this scrub in the shower.
That’s it! Enjoy!!! :)
X O
Laura


Pin it! Save it to your collection.


Easy DIY Healthy Detox Tea Recipe!
Metabolism boosting. Detoxifying. Natural caffeine content. Simple vegan recipe for beginners!Oolong Tea Metabolism and Detox Recipe!

Save this recipe to your Pinterest!
This recipe makes 2 large mason jars to refrigerate for the whole week :) In this recipe we will brew the tea using a coffee maker!
This is a detoxing tea great to drink first thing in the morning to stimulate your metabolism. It also aids in digestion to drink before eating.
***This recipe is not a replacement solution for any health ailments. It is simply a metabolism boosting and detoxing drink with a high antioxidant content! :)
BENEFITS OF THE INGREDIENTS USED:
Oolong Tea-Filled with antioxidants such as calcium, manganese, copper, carotin, selenium, potassium, and magnesium and detoxifying alkaloids. Helps improve mental alertness, helps manage stress, increases metabolism, and contains a natural caffeine, and more.
Apple Cider Vinegar- Helps stabilize blood sugar and insulin. Helps detoxify your liver and lymphatic system. Great free radical protection from inside the body, and more.
Ginger- Improves digestion, reduces inflammation in the body, reduces blood sugar, anti-microbial properties, and more.
Lemon- Helps create digestive enzymes in your liver, high in vitamin C, high in antioxidants, and more.
Scroll down for a step-by-step gallery and the directions! Products are linked for your convenience.

What You’ll Need:
1) 3 Oolong tea packets.
2) 6 lemons
3) 2 large pieces of ginger
4) 2 shot glasses of apple cider vinegar
Directions:
1) Take your 3 Oolong tea packets and simply rip the tea bags open to use the tea inside the packet.
2) Sprinkle the oolong tea into your coffee maker, where you would normally put your coffee.
3) Fill the coffee maker with the maximum amount of water it can hold.
4) Cut 2 large pieces of ginger and place inside the coffee maker before brewing.
5) Now turn on your coffee maker.
6) After the tea is finished brewing, allow the tea to cool down on the counter before adding the lemon and apple cider vinegar.
7) Once cooled, distribute the brewed tea into 2 large mason jars.
8) Now, squeeze 3 lemons into one jar and 3 lemons into the other.
9) Add a shot glass of apple cider vinegar to each jar.
10) Shake each jar. You’re done! Place the jars in the refrigerator for the week.


Enjoy!
X O,
Laura


How to Rock a Dark Lip a la Julie Hewett
Dark lips are a sure way to amp up any night out with a sexy, seductive tone. What other shades will help accentuate a dark-lipped-look? Really, makeup application is supposed to be….
Coco Noir lipstick by Julie Hewett Los Angeles
Dark lips are a sure way to amp up any night out with a sexy, seductive tone.
What shades will help accentuate a dark-lipped-look on your other features? Makeup application is supposed to be fun and about the exploration of your own style– wear what works for you and you feel most confident and beautiful! However, Julie Hewett does have a few pointers and tips if you would like to reference.
In the picture of Julie Hewett’s gorgeous Tiah, she is wearing the Coco Noir lipstick in the Luxe Creamy Matte Lipstick collection.
CLICK HERE TO SEE THE PICTURE!
She pairs this dark shade with a rose color blush shade with a brown undertone. Shop this exact shade in “Destiny” cheekie pot by Julie Hewett. Shop it HERE.
Hewett then used her Breathless Palette to accentuate her eyes with a burgundy/wine color mix. Shop this palette HERE.
Finally, Hewett topped the lid with a shimmer along Tia’s brow bone with a light colored shimmer using Julie Hewett’s very own shimmer in her Shimmy line in shade “Goldie.“ Shop “Goldie” HERE.
So, where are you going to rock this dark lip seduction?